So you want to make a Maki sushi roll? Well, the good news is that you don't have to go to culinary school nor visit with a Japanese Iron Chef to make a tasty Maki roll which is the most basic form of sushi making. All you need are some quality ingredients, a little patience and this guide.
When I make my rice, I like to use a piece of Kombu kelp which I stick in my rice maker prior to cooking my rice. This is completely optional, however I find that it helps with giving your rice that umame flavor.
After your rice is done, you'll preferably want to put it in a wooden bowl so that when you use the rice vinegar, it doesn't react with the bowl's material. For a more detailed set of instructions on how to make the perfect sushi rice for your Maki roll, check out this sushi rice recipe.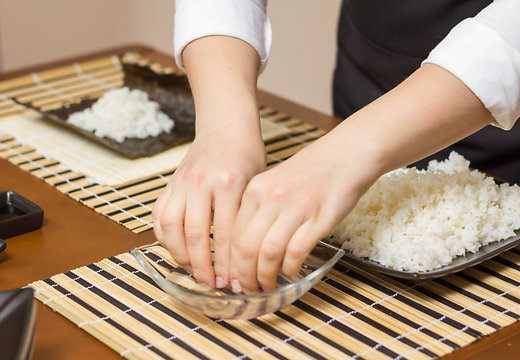
Your Nori sheet has a shiny and rough side; make sure to place the shiny side on your bamboo mat so that the rough side faces up. Lightly moisten your hands in a bowl of water to help prevent the rice from sticking to your hands and then take about a 1/2 cup of rice and place it on the center of your Nori sheet. (I typically like to use a 1/4 of a cup of rice to avoid eating too many starchy carbs in one sitting).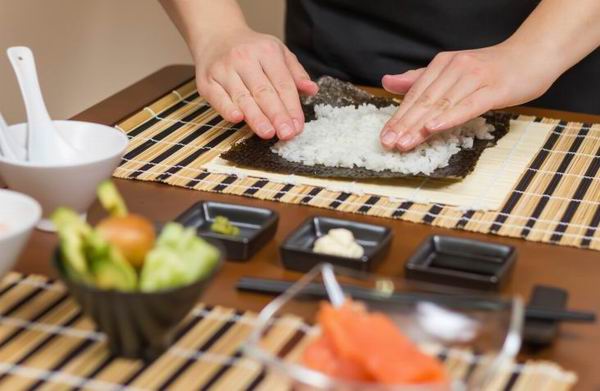
Gently spread the rice along the Nori but make sure not to compress it so that the rice doesn't get mushy. Leave approximately two centimeters on the top uncovered as this empty space is needed to ensure that you're able to close your sushi roll properly.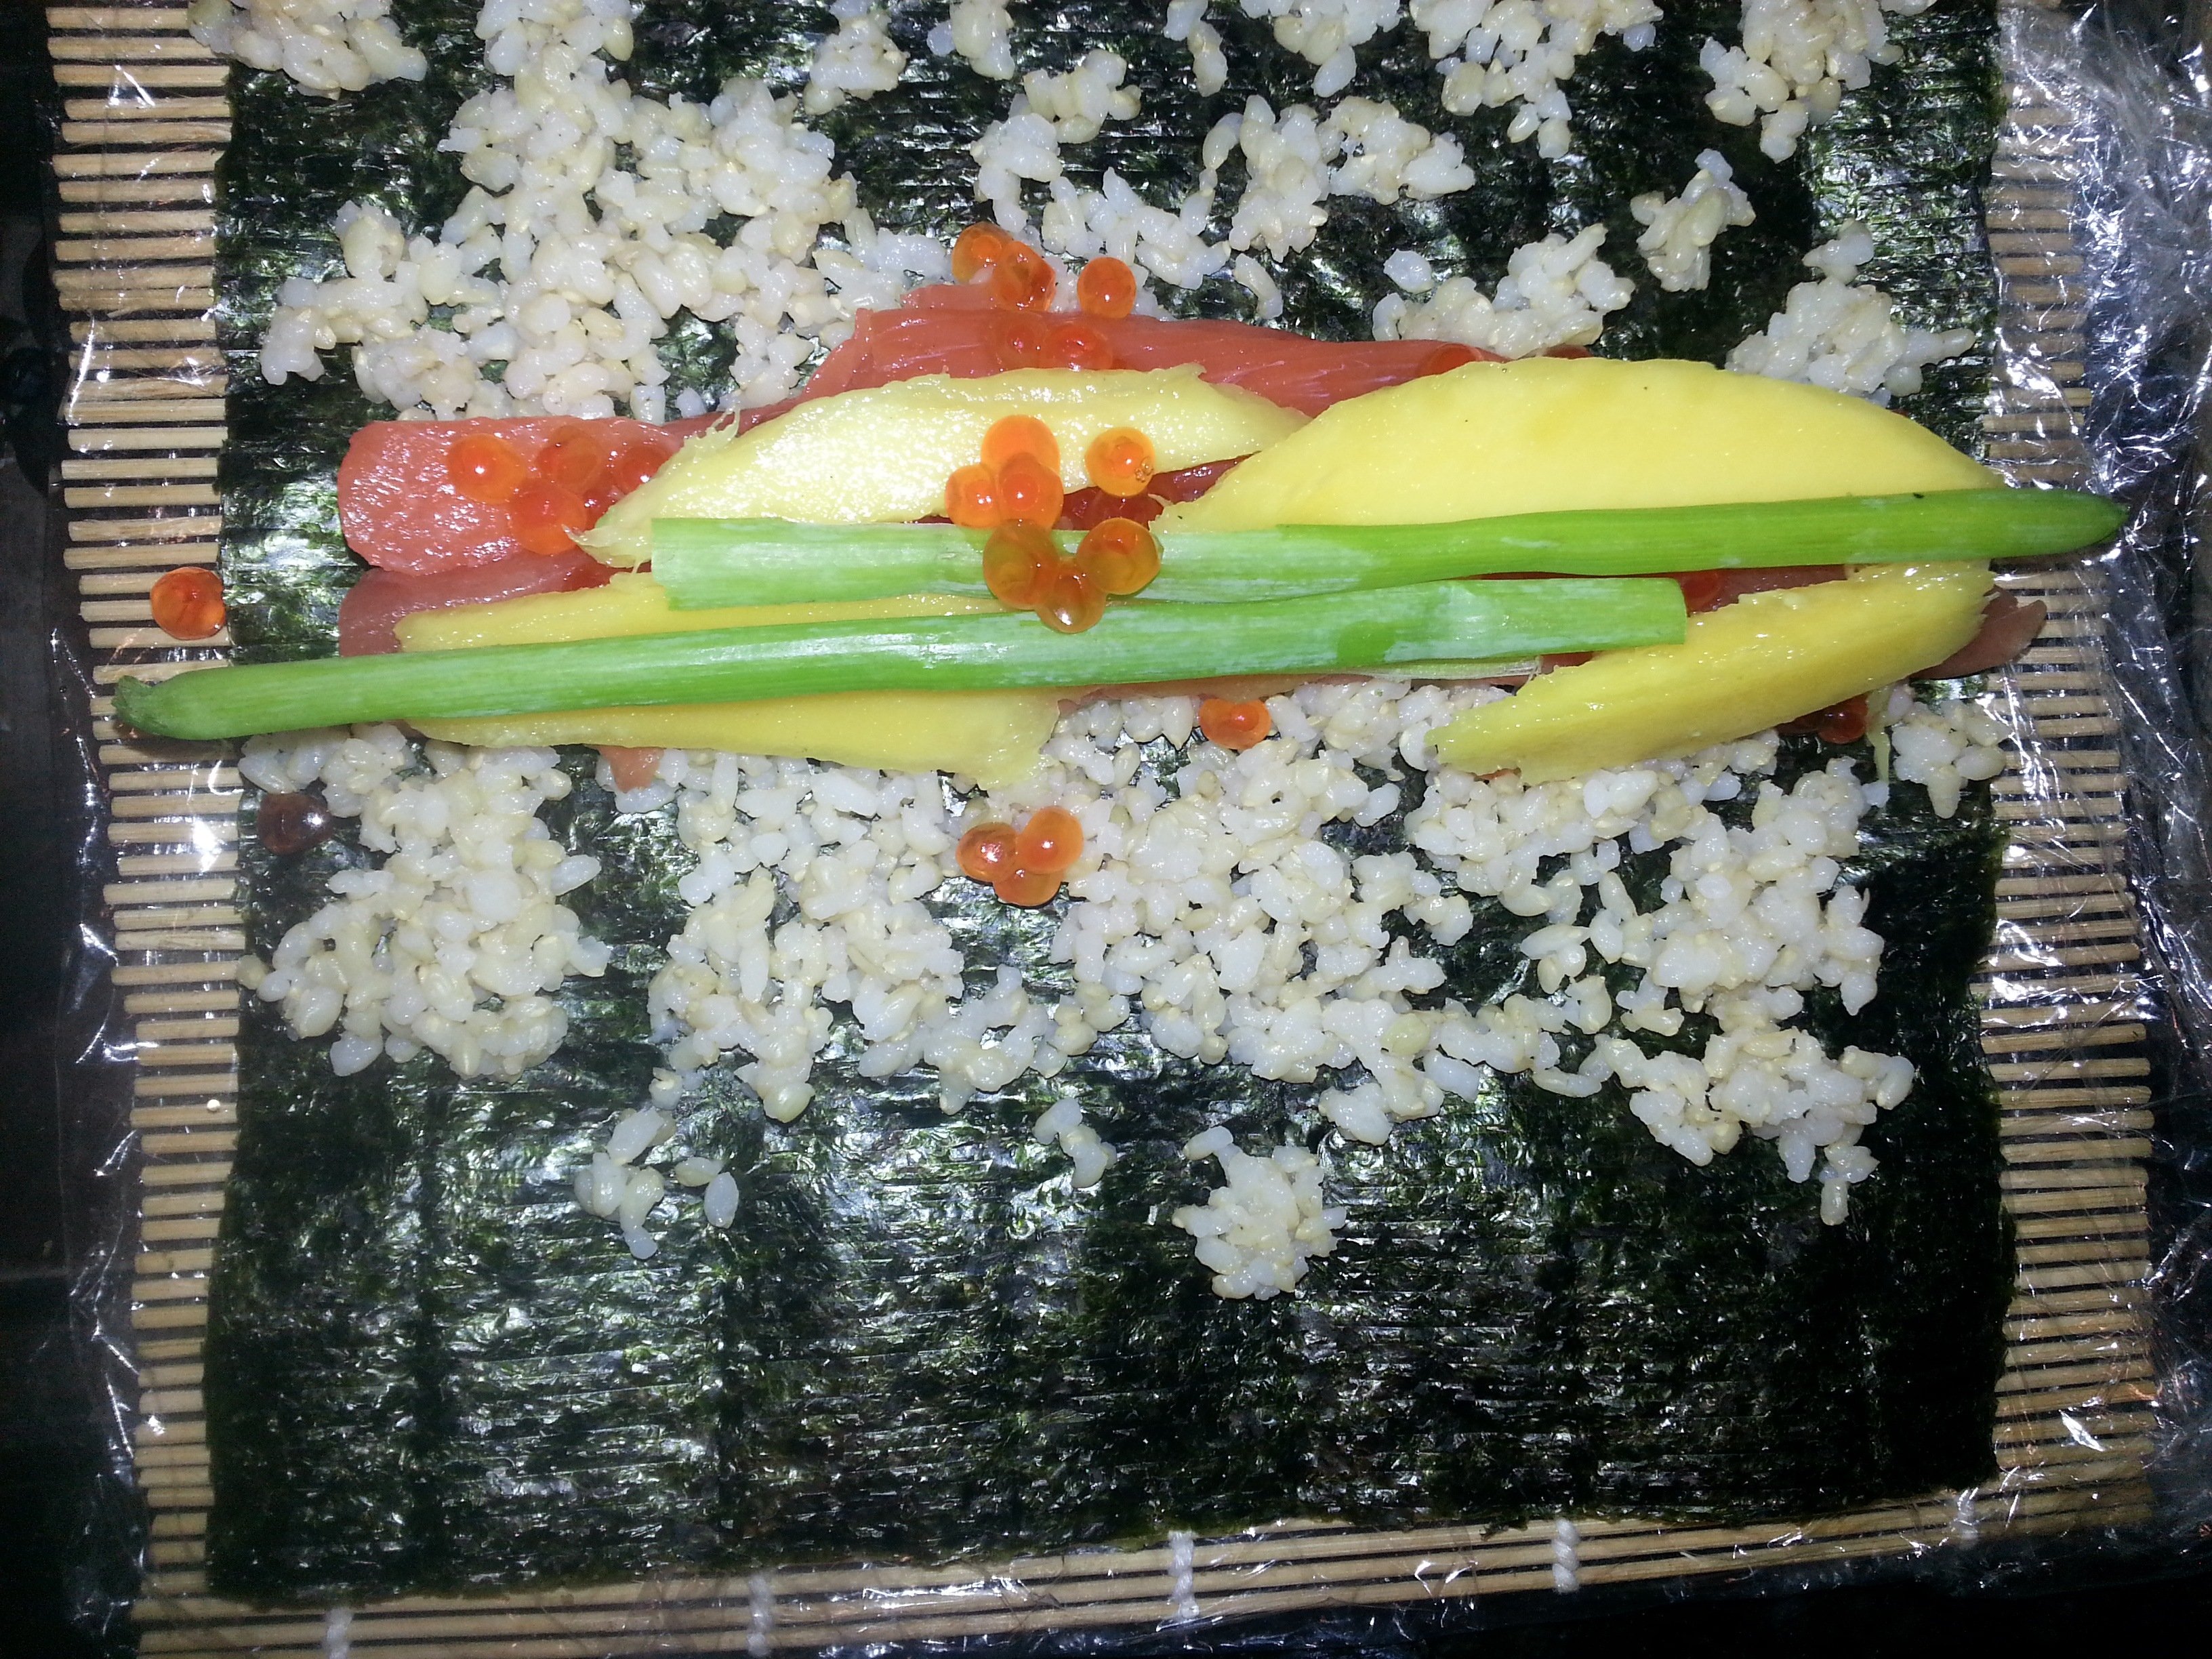
Now it's time for the fun part! Place your ingredients of choice, either along the center or along the edge (it comes down to a matter of preference on rolling - in this tutorial, the ingredients are in the center). Let your imagination go wild - think about colors and taste as you place your ingredients. Just make sure not to put too many otherwise you will have a hard time rolling the sushi. A good rule of thumb is one piece of fish and 1 - 3 pre-cut slices of vegetables/fruits. You can even sprinkle sesame seeds or tobiko on the rice. Some people like to put a very thin layer of wasabi in the roll.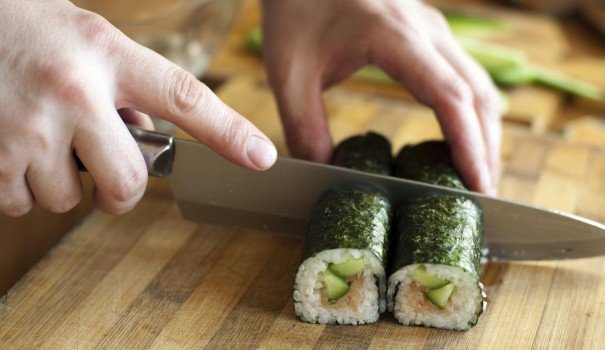
Take your knife and wet it slightly. Cut your roll in the middle and then take each of these halves and cut in the middle again. Repeat this process again and you'll be left with 8 perfectly cut rolls.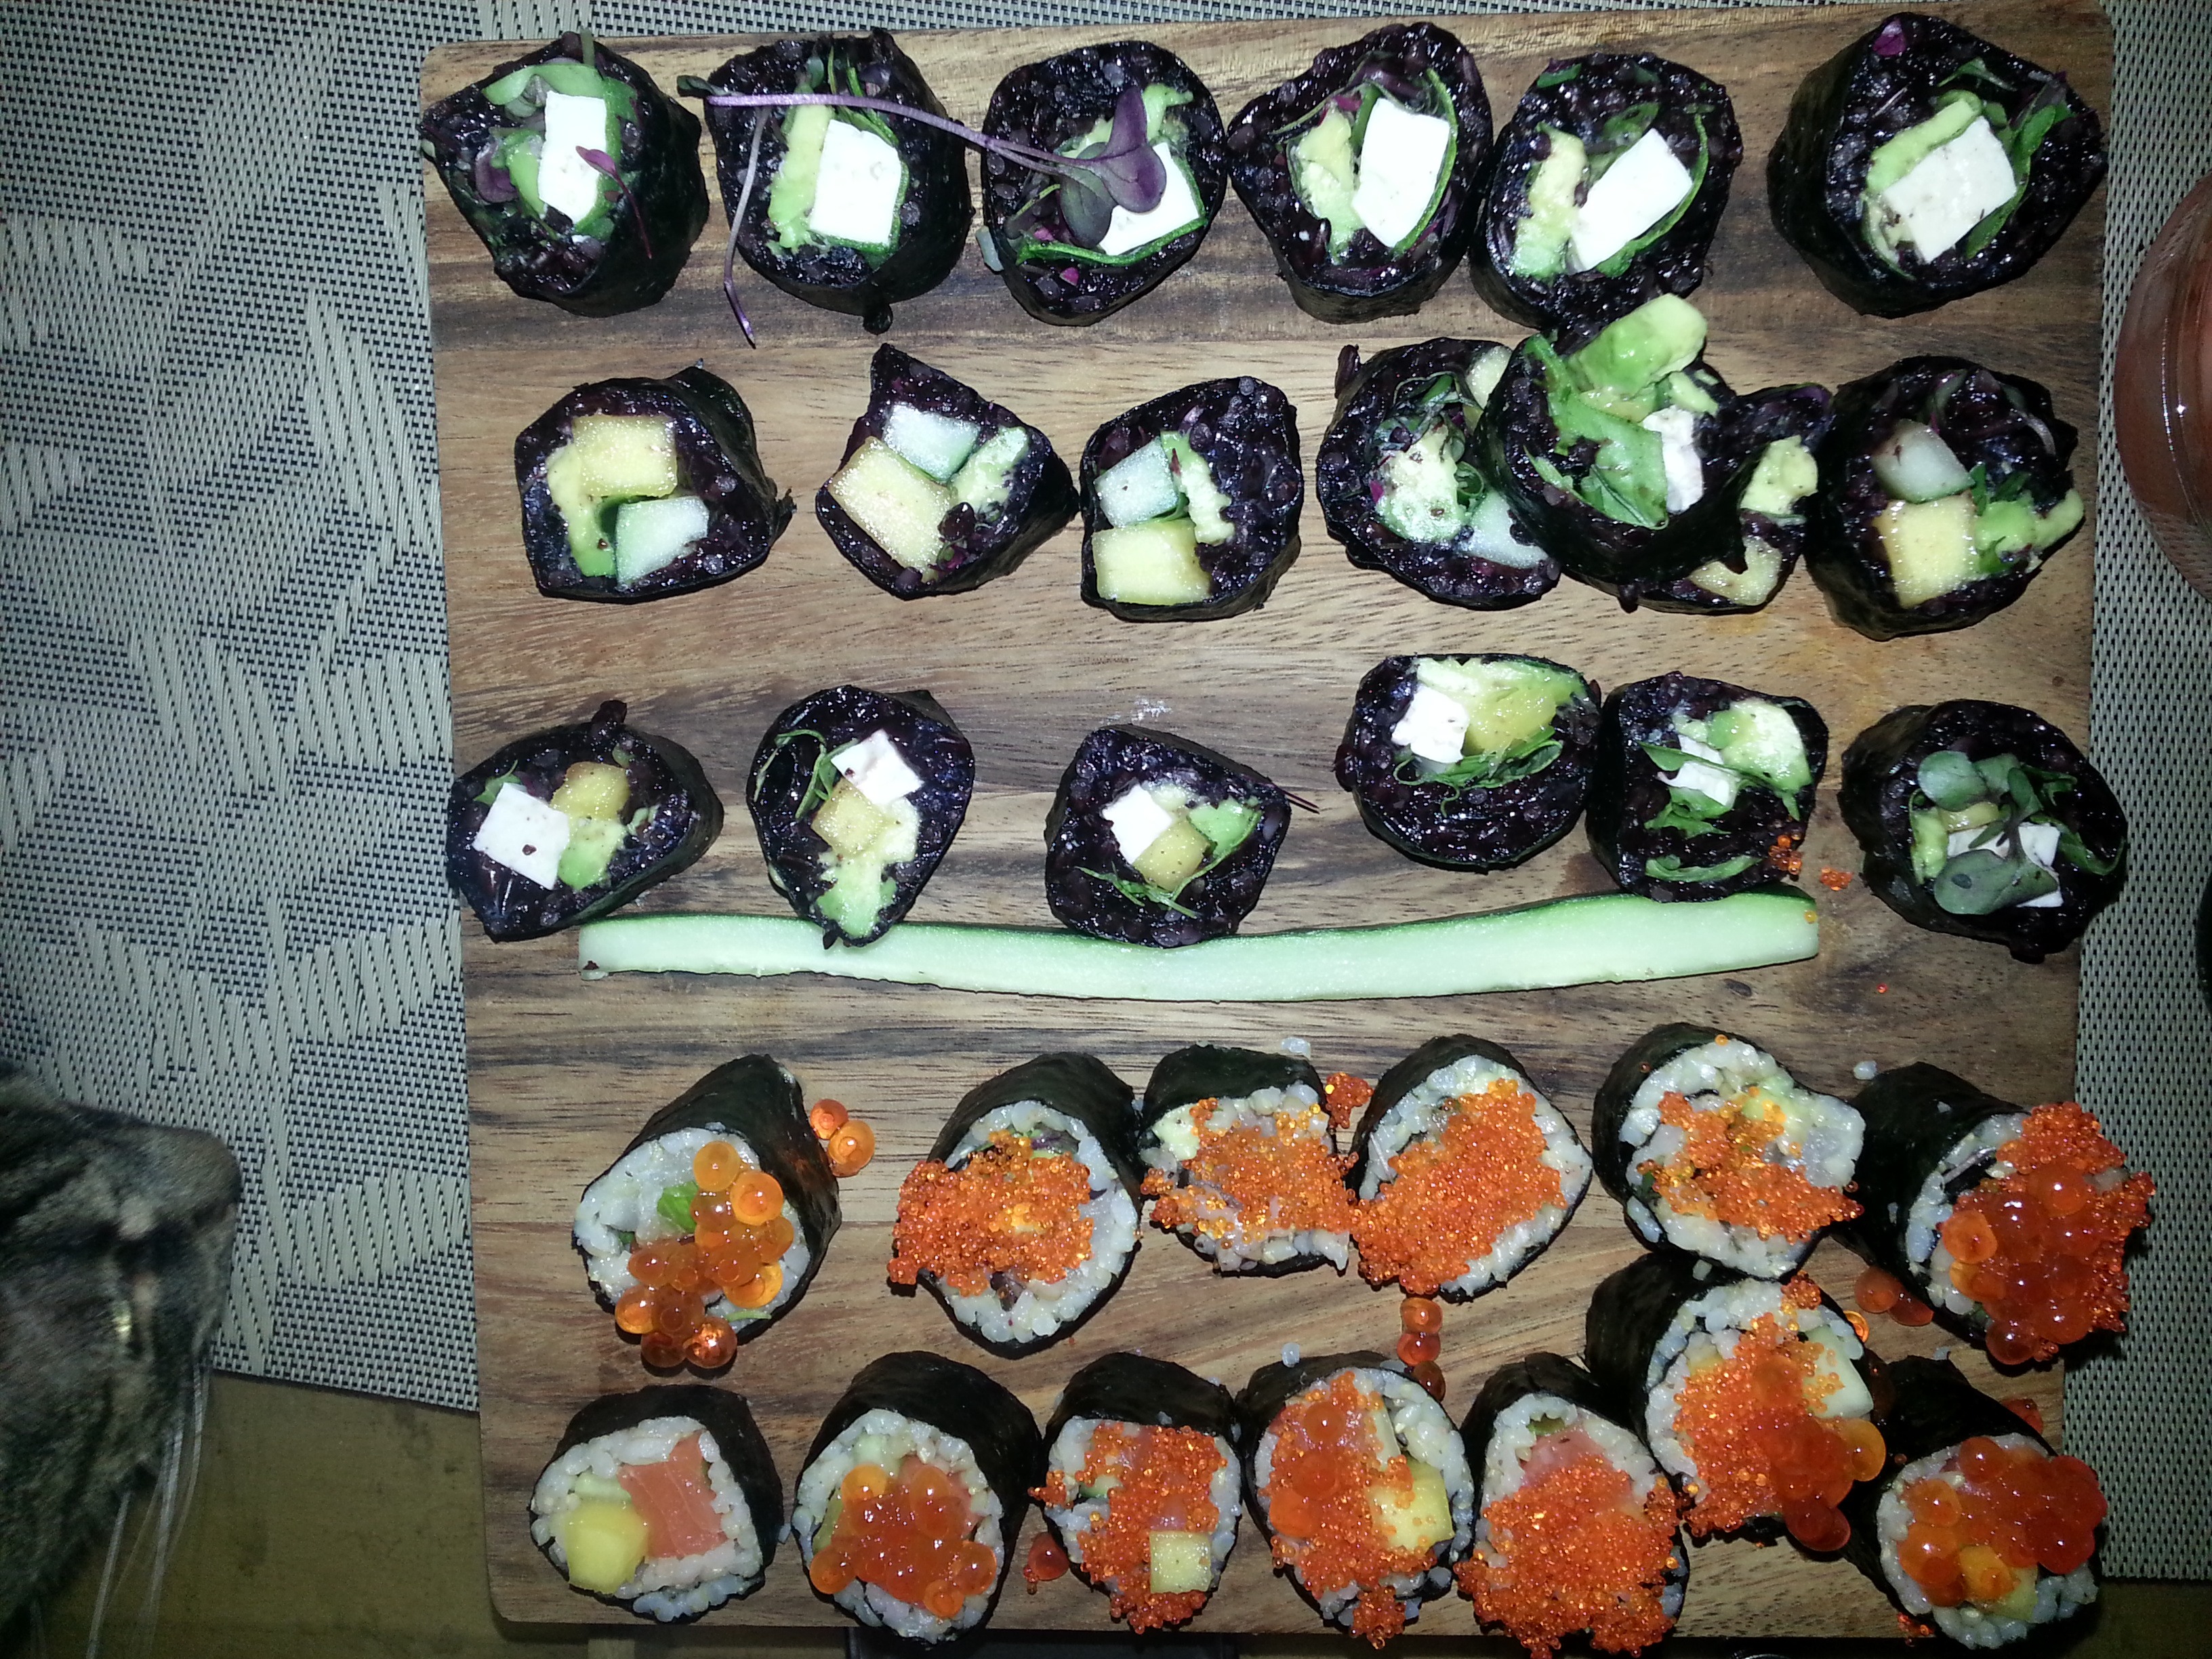
Put the rolls on a serving plate... bonus points for a wooden serving tray. Serve with ginger, soy sauce and wasabi.
Stay tuned for a tutorial on making inside-out rolls! Let us know in the comments if you found this easy to do and what type of rolls you decided to make!
What You Need Prior to Making Your Sushi
- Sushi rice/short grain rice (you can use white, brown, black).
- Nori
- Piece of sushi-quality fish (unless you're a vegetarian/vegan). Do not use regular fish from the super market unless you like food poisoning. The fish you use must be sushi-grade!!
- Vegetables/Fruits - some popular choices are avocado, green onion, cucumber and mango.
- Rice vinegar.
- Bowl of water.
- Sharp knife.
- Bamboo mat. If you're a beginner, this is probably a necessity as it'll make rolling your sushi way easier.
- Saran wrap. (You'll want to use this to cover your bamboo mat).
Optional Things for Making Sushi
- Rice cooker. This will make your life so much easier when making rice in general. You can also use a rice maker for making oatmeal or use it for some of these cool kitchen hacks.
- Kombu kelp. This will give your rice that umame flavor.
- Sesame seeds
- Tobiko/flying fish roe.
- Ginger (for the side - helps to clean the palate).
- Wasabi and soy sauce (for dipping your rolls).
Making the Rice
Prior to making your Maki roll, you're going to need to make your rice as this is the most important component to a great sushi roll. I prefer using a rice cooker as you can just set it and leave it, however you could cook your rice over a stove, though you'll need to constantly keep an eye on it.When I make my rice, I like to use a piece of Kombu kelp which I stick in my rice maker prior to cooking my rice. This is completely optional, however I find that it helps with giving your rice that umame flavor.
After your rice is done, you'll preferably want to put it in a wooden bowl so that when you use the rice vinegar, it doesn't react with the bowl's material. For a more detailed set of instructions on how to make the perfect sushi rice for your Maki roll, check out this sushi rice recipe.
1. The Beginning of Your Maki Sushi Roll
Your Nori sheet has a shiny and rough side; make sure to place the shiny side on your bamboo mat so that the rough side faces up. Lightly moisten your hands in a bowl of water to help prevent the rice from sticking to your hands and then take about a 1/2 cup of rice and place it on the center of your Nori sheet. (I typically like to use a 1/4 of a cup of rice to avoid eating too many starchy carbs in one sitting).
2. Spread it Out
Gently spread the rice along the Nori but make sure not to compress it so that the rice doesn't get mushy. Leave approximately two centimeters on the top uncovered as this empty space is needed to ensure that you're able to close your sushi roll properly.
3. The Fun Part
Now it's time for the fun part! Place your ingredients of choice, either along the center or along the edge (it comes down to a matter of preference on rolling - in this tutorial, the ingredients are in the center). Let your imagination go wild - think about colors and taste as you place your ingredients. Just make sure not to put too many otherwise you will have a hard time rolling the sushi. A good rule of thumb is one piece of fish and 1 - 3 pre-cut slices of vegetables/fruits. You can even sprinkle sesame seeds or tobiko on the rice. Some people like to put a very thin layer of wasabi in the roll.
4. Roll Your Maki Sushi Roll
Dampen a paper towel and lightly wet the edge of the Nori that has no rice on it. Use your bamboo mat to begin the rolling process and press lightly. As you press on the sushi mat, you want to make sure to apply even and gentle pressure, pressing the roll into a square shape. As you form a square, make sure to press on all the sides in the middle and then on the outer edges. Confused? No worries!! Watch the video tutorial above which will explain how to roll your Maki sushi.5. Cut the Sushi
Take your knife and wet it slightly. Cut your roll in the middle and then take each of these halves and cut in the middle again. Repeat this process again and you'll be left with 8 perfectly cut rolls.
6. Display Your Beautiful Maki Rolls
Put the rolls on a serving plate... bonus points for a wooden serving tray. Serve with ginger, soy sauce and wasabi.
Stay tuned for a tutorial on making inside-out rolls! Let us know in the comments if you found this easy to do and what type of rolls you decided to make!