Before the advent of the uber-popular show Mythbusters or the push for more STEM (Science, Technology, Engineering and Mathematics) in schools, parents and their kids were doing at-home science experiments. Now, the trend continues to blossom, although many of the experiments have remained somewhat the same…and always awesomely exciting!
If you’re a parent and you want to do something with your kid that isn’t related to cleaning the toilets or forging through homework, check out these 20 great science projects that you can complete in the confines of your humble abode. Most of them use around-the-home items that you probably have on hand, although some will require a little bit of shopping ahead of time. To help you decide which are best for your children’s needs, the 20 have been divided into projects for younger students and projects for older ones.
Want to visually explain how bleach works? This is as easy as it gets!
What you’ll need for this project:
Source
2: Buoyancy “Magic”
For this project, you’ll need only a ketchup packet and a one- or two-liter plastic bottle filled about three-quarters of the way to the top with water. Pop the ketchup packet into the bottle, and then squeeze the bottle to see if you can make the packet move up or down. Try different packets, such as those of mustard or soy sauce. Do they move the same way as the ketchup packet did?
Source
3. Rain, Rain, Don’t Go Away!
Make it rain inside your house.
You’ll need:
Source
4. Sunscreen Importance 101
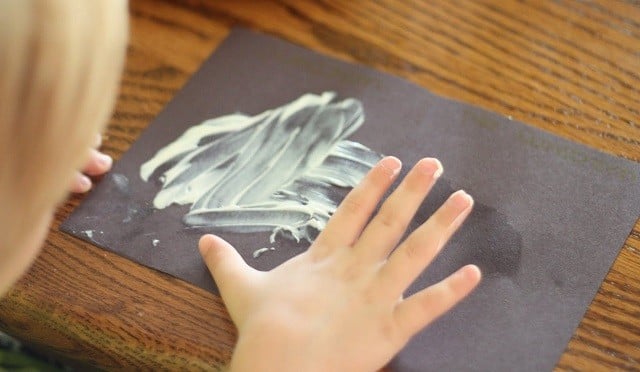
Do your kids whine about wearing sunscreen? Show them the value of it with some sunscreen and black construction paper. Put a dab of sunscreen onto the paper and then smear it around. Place the black construction paper into direction sunlight for a few hours. Notice how the construction paper fades where the sunscreen wasn’t applied.
Source
5. What Color is Your Celery?
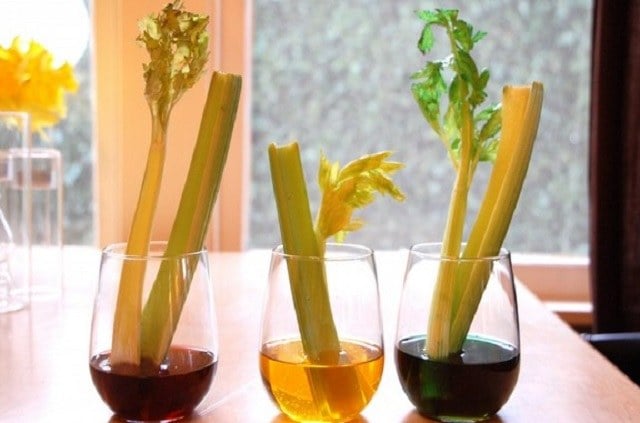
Little kids love to see how foods can be used for the purpose of science. In this experiment, they’ll play with celery and food coloring.
You’ll just need some celery stalks, water, clear glasses and several shades of food coloring. Fill each glass halfway with water and then add some food dye to each glass. Cut the celery stalks so the leafy part is at the top. Place the other end directly into the glass. Over several hours, the colored water will begin to move up into the stalk. After a period of time, the kids will see how the porous celery has absorbed the colored water.
NOTE: Some children are allergic to certain food dyes, so it’s best not to eat this experiment as a snack!
Source
6. Make Your Own Jellyfish
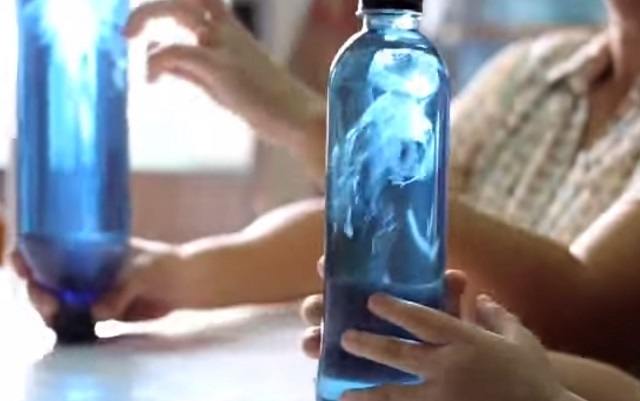
This experiment is mostly for pleasure, but kids really do love the results.
You’ll only need a one- or two-liter clear bottle (cleaned), a clear plastic grocery bag, dyed water (blue is nice), scissors and a white string. First, fill the bottle halfway with the dyed water. Then, lay out your plastic grocery bag. Start cutting it into small strips (you may need to do some trial runs with this.) Tie the strips together to form a jellyfish-like shape.
Now, push the plastic “jellyfish” into the dyed water. Gently add more dyed water on top of it, leaving at least two or three inches of air at the top of the bottle. Tightly secure the top to the bottle, and then allow your children to play with the “jellyfish in a bottle”.
Source
7. Magnetic Magic

Want to show a little one the power of magnets? Get an empty, clear two-liter soda bottle. Fill it with half-inch long pipe cleaner bits. (You can just cut them to this size.) There should be about 3-4 inches worth at the bottom of the soda bottle when you’re finished.
Now, let your child use a larger magnet to run along the side of the soda bottle. The metal-based pipe cleaners will be attracted to the magnets.
Source
8. Will It Dissolve?
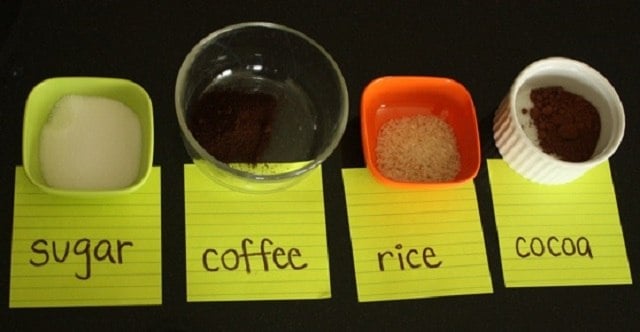
This is another fast experiment that doesn’t take much time to set up, but can provide a lot of fun discussions. You’ll just need a clear bowl filled with water, and several other bowls each filled with a variety of items: salt, sugar, baking soda, rice, tea, coffee, spices. Allow your child to put one ingredient into the bowl of water. Then, see if it dissolves. Continue with the experiment, removing the old water and re-filling the bowl each time.
Source
9. How Does an Elephant Brush His Teeth?
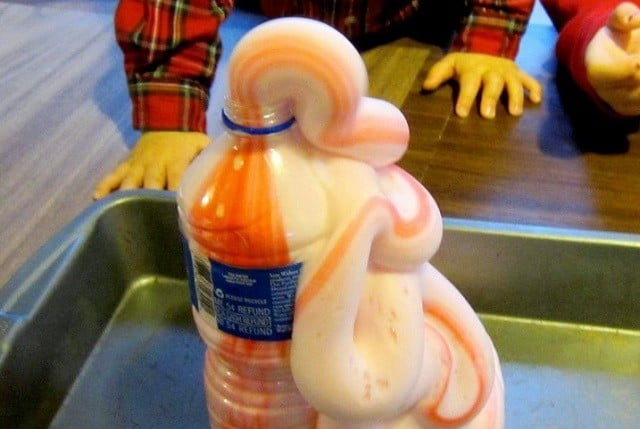
Have you ever wondered what elephant toothpaste might look like? Tell your kids that you’re going to make some together.
What you’ll need for this project:
10. The Twisted Candy Cane

Have too many candy canes after the holidays? Don’t pitch them or force yourself to eat them – turn them into science projects instead!
For this experiment, you’ll need several candy canes (any flavors or sizes should do), a baking sheet, an oven and some aluminum foil. Carefully unwrap the candy canes and place them onto pieces of aluminum foil that are shaped like they are. Put the aluminum foil and candy canes onto the baking sheet.
Preheat the oven to 350 degrees Fahrenheit. When the oven is hot, pop the baking sheet into the oven. After two or three minutes, check on the candy canes. Don’t allow them to melt; they should just be malleable, not drippy! Test them with tongs, not your fingers. When they seem bendable, take them out of the oven and wait a minute so they won’t burn your hands. At the point that they can be safely touched, allow your children to twist them into shapes. Make pretzels and circles and curlicues!
Source
11. Make Giant Gummies
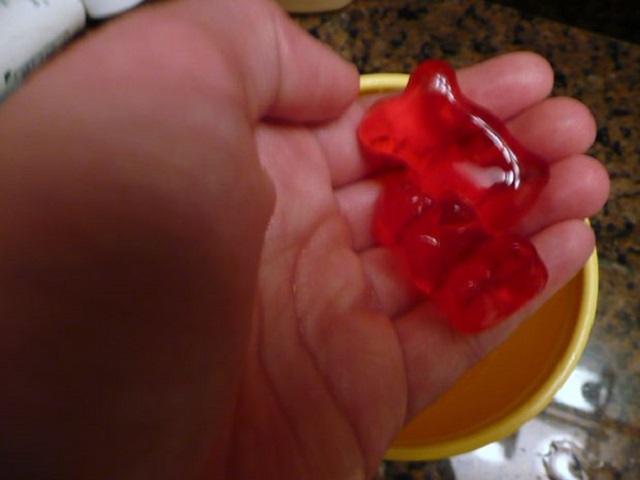
Who doesn’t love a gummy bear? It’s even better when you see your favorite gummy treat expand to twice its size… or greater. Simply drop a gummy into a clean mason jar filled with water and wait. The porous gummy will absorb the liquid and expand.
Source
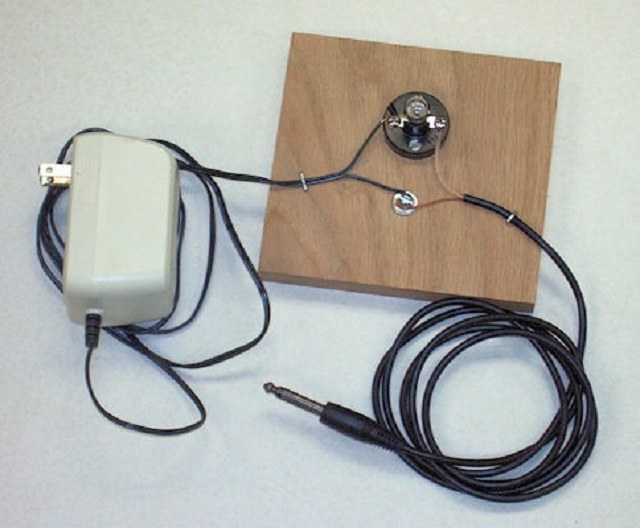
This experiment tests the electrical conductivity of several water-based liquids. It’s fascinating to see which conduct electricity and which don’t.
What you’ll need for this project:
Source
2. It’s a Bird, It’s a Plane, It’s a Hovercraft!

Create a simple hovercraft that’s cool to operate using only a CD (make sure it’s one you don’t want to use again), a push-up top from a water bottle (cleaned), a balloon (round is best) and some superglue.
Directions:
3. How Egg-cellent!
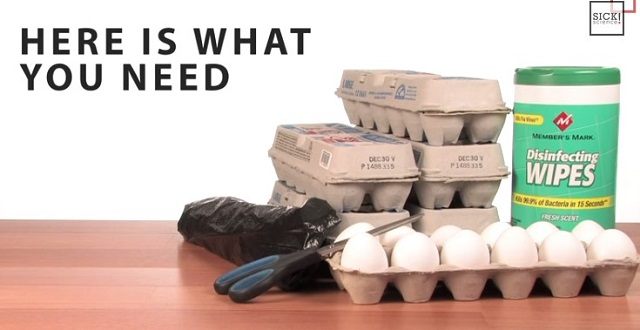
Did you ever want to walk on eggs, just to see what would happen? This project is hilarious, and great for groups of kids. While it’s fine for the younger set, it’s probably more impactful for older children.
You’ll need plenty of egg cartons filled with large eggs to create an eggy “walkway”, so if you’re doing this as a group, ask for donations. Lay down a layer of plastic garbage bags under the cartons of eggs, and line the cartons up lengthwise two cartons deep. Two-by-two, you can create long walkways.
Have all the kids remove their shoes and socks, and then line them up. Two kids can assist the child who is walking on the eggs. He or she should be asked to keep his or her foot as flat as possible to make this work. The assistants should help by alleviating some of the weight. Ideally, the child should be able to walk across all the eggs without breaking any.
NOTE: Be prepared for some eggs to break during the project. This means you’ll need some way to wash off goopy feet!
Source
4. DIY Tornado
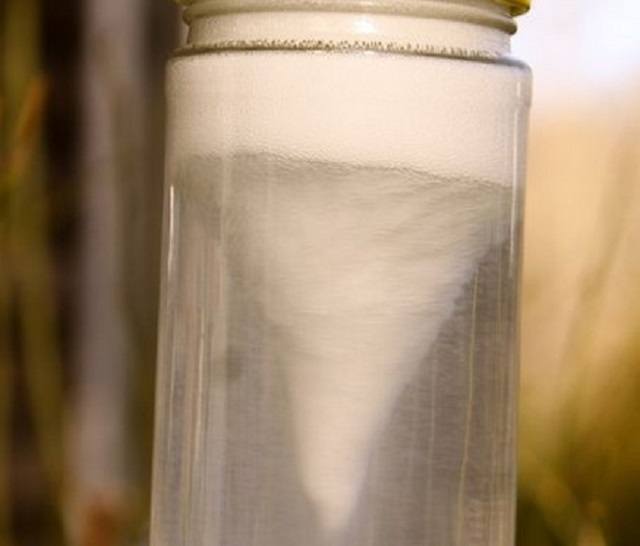
You can easily show how a tornado works with a mason jar, water and dishwashing detergent. Simply fill the mason jar about three-quarters of the way full with water, and add a few drops of the dishwashing detergent. Secure the top on the jar, and then shake it hard. Place the jar on a table, and a funnel should appear. Voila! Instant tornado!
Source
5. Oobleck Fun
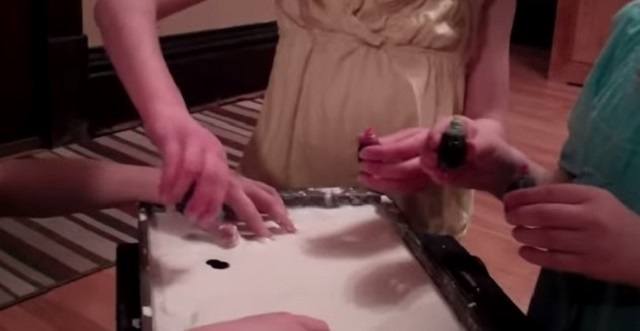
If you’ve never heard of Oobleck, it’s a creation of two cups of cornstarch mixed with one cup of water. When you play with it, it’s like a solid. When you allow it to rest, it becomes a liquid. Have fun trying some different ways of making it turn from a solid to a liquid and back again. This can make a really intriguing science fair project.
Source
6. Help a Plant See the Light
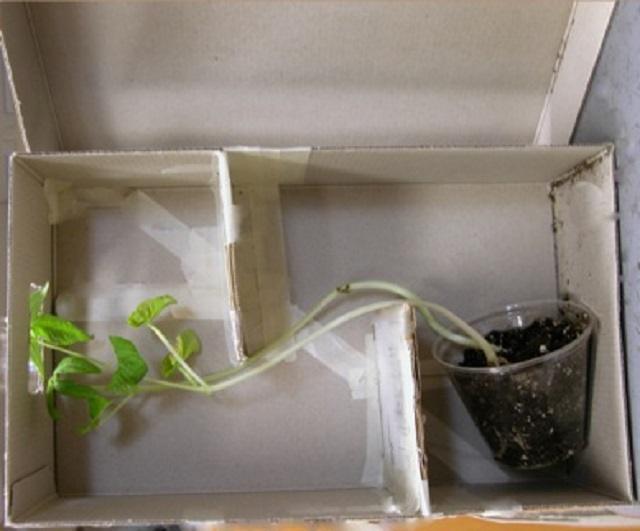
Plants will always try to seek the sunlight, and you can show how this happens by making a maze out of shoebox, and then adding an everyday bean plant to the bottom of the maze. As the plant stretches and grows, it will twist and turn throughout the maze in order to reach the sun.
NOTE: This experiment takes place over several weeks. Again, it’s great for a science fair project or classroom experiment because of its length.
Source
7. Eeek! That Egg Is Naked!
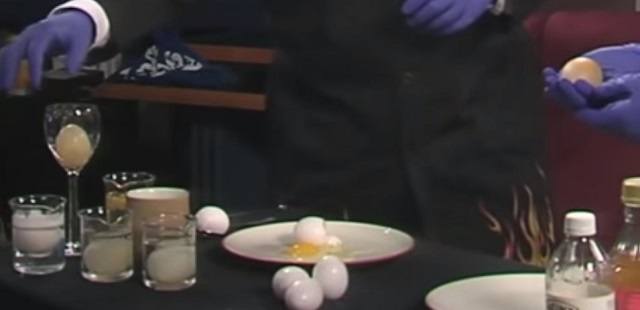
When most eggs are without their shells, they certainly can’t be easily handled. But what would happen if you allowed an uncooked egg to sit in a glass filled with vinegar for about a day? Try it and carefully remove the shell, which will already been partially removed from the acidic solution. The egg should feel rubbery. See if it will splatter when you drop it from a height of a few inches.
Source
8. Make Fireflies with a Glow Stick
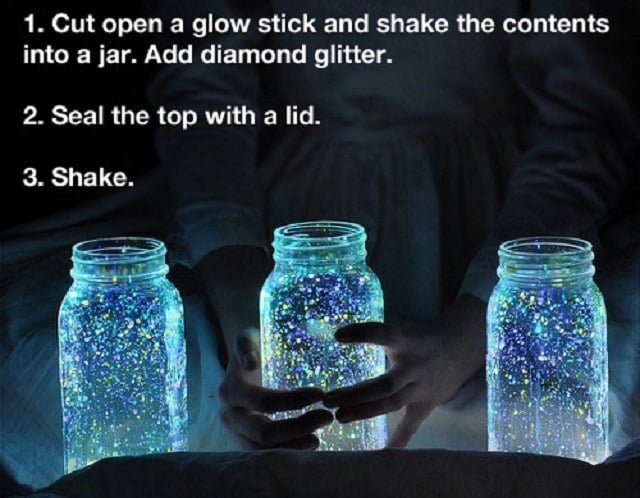
Tired of waiting around for summer to come and the fireflies to make their presence? Buy some glow sticks at the dollar store and open them up very carefully. Put the contents of the sticks into cleaned mason jars. Seal the jars, and then shake them well. The glow stick chemicals will affix to the jar sides and provide a soft glow. This is actually a nifty experiment if kids are going to have a classroom party and want a cool effect for table lanterns.
Source
9. It’s “Snot” Funny!
Okay, it really is funny. Snot, that is. So why not create your own? Yes, it’s disgusting… but it’s an unforgettable experiment.
What you’ll need for this project:
ADDED BONUS: Put some green food coloring into the boiling water.
Source
Remember that you don’t have to go hog-wild with science projects. Even uncomplicated ones can pack an amazing wallop of fun.
If you’re a parent and you want to do something with your kid that isn’t related to cleaning the toilets or forging through homework, check out these 20 great science projects that you can complete in the confines of your humble abode. Most of them use around-the-home items that you probably have on hand, although some will require a little bit of shopping ahead of time. To help you decide which are best for your children’s needs, the 20 have been divided into projects for younger students and projects for older ones.
11 Cool Science Projects for the Younger Set
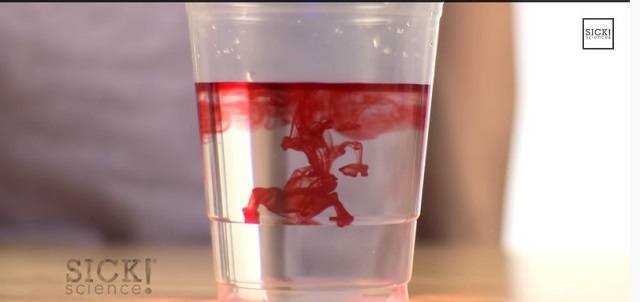
1. Now You See It, Now You Don’t!Want to visually explain how bleach works? This is as easy as it gets!
What you’ll need for this project:
- Two clear plastic cups
- Food coloring (red is great to use)
- Bleach
- Water
- Fill one plastic cup three-quarters of the way with water
- Add several drops of food coloring to the water and mix it up until it is red/pink
- Fill the other plastic cup one-quarter of the way with bleach
- Slowly add the bleach to the water mixture
- Watch as the bleach expands the molecules of dye attached to the water molecules, thereby making the water look clear again
Source
2: Buoyancy “Magic”
For this project, you’ll need only a ketchup packet and a one- or two-liter plastic bottle filled about three-quarters of the way to the top with water. Pop the ketchup packet into the bottle, and then squeeze the bottle to see if you can make the packet move up or down. Try different packets, such as those of mustard or soy sauce. Do they move the same way as the ketchup packet did?
Source
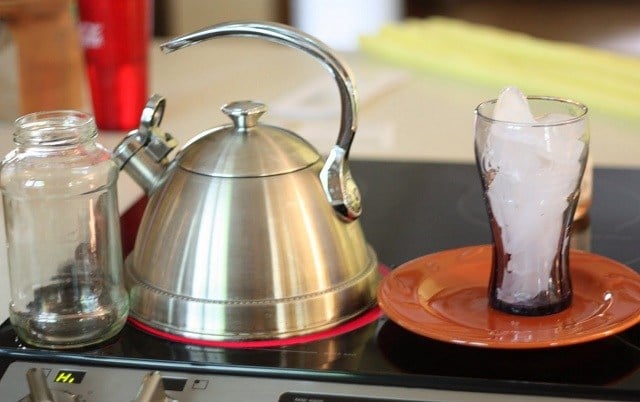
3. Rain, Rain, Don’t Go Away!
Make it rain inside your house.
You’ll need:
- A plate
- A glass mason jar
- Ice cubes (about one or two cups)
- Very hot water
Source
4. Sunscreen Importance 101
Do your kids whine about wearing sunscreen? Show them the value of it with some sunscreen and black construction paper. Put a dab of sunscreen onto the paper and then smear it around. Place the black construction paper into direction sunlight for a few hours. Notice how the construction paper fades where the sunscreen wasn’t applied.
Source
5. What Color is Your Celery?
Little kids love to see how foods can be used for the purpose of science. In this experiment, they’ll play with celery and food coloring.
You’ll just need some celery stalks, water, clear glasses and several shades of food coloring. Fill each glass halfway with water and then add some food dye to each glass. Cut the celery stalks so the leafy part is at the top. Place the other end directly into the glass. Over several hours, the colored water will begin to move up into the stalk. After a period of time, the kids will see how the porous celery has absorbed the colored water.
NOTE: Some children are allergic to certain food dyes, so it’s best not to eat this experiment as a snack!
Source
6. Make Your Own Jellyfish
This experiment is mostly for pleasure, but kids really do love the results.
You’ll only need a one- or two-liter clear bottle (cleaned), a clear plastic grocery bag, dyed water (blue is nice), scissors and a white string. First, fill the bottle halfway with the dyed water. Then, lay out your plastic grocery bag. Start cutting it into small strips (you may need to do some trial runs with this.) Tie the strips together to form a jellyfish-like shape.
Now, push the plastic “jellyfish” into the dyed water. Gently add more dyed water on top of it, leaving at least two or three inches of air at the top of the bottle. Tightly secure the top to the bottle, and then allow your children to play with the “jellyfish in a bottle”.
Source
7. Magnetic Magic
Want to show a little one the power of magnets? Get an empty, clear two-liter soda bottle. Fill it with half-inch long pipe cleaner bits. (You can just cut them to this size.) There should be about 3-4 inches worth at the bottom of the soda bottle when you’re finished.
Now, let your child use a larger magnet to run along the side of the soda bottle. The metal-based pipe cleaners will be attracted to the magnets.
Source
8. Will It Dissolve?
This is another fast experiment that doesn’t take much time to set up, but can provide a lot of fun discussions. You’ll just need a clear bowl filled with water, and several other bowls each filled with a variety of items: salt, sugar, baking soda, rice, tea, coffee, spices. Allow your child to put one ingredient into the bowl of water. Then, see if it dissolves. Continue with the experiment, removing the old water and re-filling the bowl each time.
Source
9. How Does an Elephant Brush His Teeth?
Have you ever wondered what elephant toothpaste might look like? Tell your kids that you’re going to make some together.
What you’ll need for this project:
- A two-liter soda bottle, cleaned
- Hydrogen peroxide solution (at least 6% or greater)
- Dishwashing soap (liquid)
- Warm water
- One yeast packet
- Food coloring
- A cooking pan (such as for a roast)
- Place the soda bottle upright in the middle of the cooking pan
- Fill the bottle with a half cup of hydrogen peroxide, a few drops of the food coloring, and a few drops of the dishwashing soap
- In another bowl, mix together two tablespoons of the warm water and the yeast, allowing the yeast to dissolve
- Allow your child to SLOWLY pour the yeast mixture into the soda bottle mixture and watch the elephant toothpaste come to life
10. The Twisted Candy Cane
Have too many candy canes after the holidays? Don’t pitch them or force yourself to eat them – turn them into science projects instead!
For this experiment, you’ll need several candy canes (any flavors or sizes should do), a baking sheet, an oven and some aluminum foil. Carefully unwrap the candy canes and place them onto pieces of aluminum foil that are shaped like they are. Put the aluminum foil and candy canes onto the baking sheet.
Preheat the oven to 350 degrees Fahrenheit. When the oven is hot, pop the baking sheet into the oven. After two or three minutes, check on the candy canes. Don’t allow them to melt; they should just be malleable, not drippy! Test them with tongs, not your fingers. When they seem bendable, take them out of the oven and wait a minute so they won’t burn your hands. At the point that they can be safely touched, allow your children to twist them into shapes. Make pretzels and circles and curlicues!
Source
11. Make Giant Gummies
Who doesn’t love a gummy bear? It’s even better when you see your favorite gummy treat expand to twice its size… or greater. Simply drop a gummy into a clean mason jar filled with water and wait. The porous gummy will absorb the liquid and expand.
Source
9 Amazing Science Experiments for Older Kids and Teens
1. It’s Conductive!This experiment tests the electrical conductivity of several water-based liquids. It’s fascinating to see which conduct electricity and which don’t.
What you’ll need for this project:
- One conductivity board (you can make your own or buy one online)
- A glass bowl
- Water
- Different water-soluble liquids and solids (bleach, laundry detergents, food coloring, glycerine, salt, sugar, baking soda)
- Hook up the conductivity board
- Pour water into the glass bowl
- Test the conductivity of the water alone
- Add one of the water-soluble liquids or solids to the water and then retest, making note of any differences or similarities
Source
2. It’s a Bird, It’s a Plane, It’s a Hovercraft!
Create a simple hovercraft that’s cool to operate using only a CD (make sure it’s one you don’t want to use again), a push-up top from a water bottle (cleaned), a balloon (round is best) and some superglue.
Directions:
- Superglue the push-up top to the middle of the CD
- After the glue is dry, blow up the balloon
- Affix the balloon over the push-up top
- Place the CD onto a non-carpeted, bare floor and watch as the CD hovers from the escaping balloon air
3. How Egg-cellent!
Did you ever want to walk on eggs, just to see what would happen? This project is hilarious, and great for groups of kids. While it’s fine for the younger set, it’s probably more impactful for older children.
You’ll need plenty of egg cartons filled with large eggs to create an eggy “walkway”, so if you’re doing this as a group, ask for donations. Lay down a layer of plastic garbage bags under the cartons of eggs, and line the cartons up lengthwise two cartons deep. Two-by-two, you can create long walkways.
Have all the kids remove their shoes and socks, and then line them up. Two kids can assist the child who is walking on the eggs. He or she should be asked to keep his or her foot as flat as possible to make this work. The assistants should help by alleviating some of the weight. Ideally, the child should be able to walk across all the eggs without breaking any.
NOTE: Be prepared for some eggs to break during the project. This means you’ll need some way to wash off goopy feet!
Source
4. DIY Tornado
You can easily show how a tornado works with a mason jar, water and dishwashing detergent. Simply fill the mason jar about three-quarters of the way full with water, and add a few drops of the dishwashing detergent. Secure the top on the jar, and then shake it hard. Place the jar on a table, and a funnel should appear. Voila! Instant tornado!
Source
5. Oobleck Fun
If you’ve never heard of Oobleck, it’s a creation of two cups of cornstarch mixed with one cup of water. When you play with it, it’s like a solid. When you allow it to rest, it becomes a liquid. Have fun trying some different ways of making it turn from a solid to a liquid and back again. This can make a really intriguing science fair project.
Source
6. Help a Plant See the Light
Plants will always try to seek the sunlight, and you can show how this happens by making a maze out of shoebox, and then adding an everyday bean plant to the bottom of the maze. As the plant stretches and grows, it will twist and turn throughout the maze in order to reach the sun.
NOTE: This experiment takes place over several weeks. Again, it’s great for a science fair project or classroom experiment because of its length.
Source
7. Eeek! That Egg Is Naked!
When most eggs are without their shells, they certainly can’t be easily handled. But what would happen if you allowed an uncooked egg to sit in a glass filled with vinegar for about a day? Try it and carefully remove the shell, which will already been partially removed from the acidic solution. The egg should feel rubbery. See if it will splatter when you drop it from a height of a few inches.
Source
8. Make Fireflies with a Glow Stick
Tired of waiting around for summer to come and the fireflies to make their presence? Buy some glow sticks at the dollar store and open them up very carefully. Put the contents of the sticks into cleaned mason jars. Seal the jars, and then shake them well. The glow stick chemicals will affix to the jar sides and provide a soft glow. This is actually a nifty experiment if kids are going to have a classroom party and want a cool effect for table lanterns.
Source
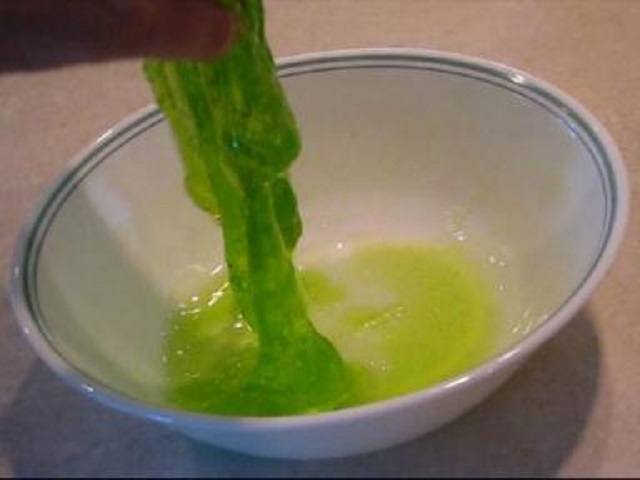
9. It’s “Snot” Funny!
Okay, it really is funny. Snot, that is. So why not create your own? Yes, it’s disgusting… but it’s an unforgettable experiment.
What you’ll need for this project:
- Boiling water
- A cup
- Plain, unflavored gelatin
- Corn syrup
- Fill the cup half-full of the boiling water
- Add three teaspoons of gelatin to the water
- Allow the gelatin to soften, then stir it with a fork
- Add a quarter of a cup of the corn syrup to the gelatin mixture
- Stir the new mixture with the fork again
- Check out the strands of “snot” that have formed
ADDED BONUS: Put some green food coloring into the boiling water.
Source
Remember that you don’t have to go hog-wild with science projects. Even uncomplicated ones can pack an amazing wallop of fun.